Pete Hudson wrote: When you sit the instrument monitor atop the yoke it does seem very tall. I bought a widescreen to limit the height but you almost have peer over the top of the dash to see out. Maybe all will look ok when I get the outside view sorted but did you have the same problem?
Hi Pete, I have the same problem with my instrument monitor. Because it has to sit on top of the yoke it raises the top of the MIP higher than it would normally be in most RL aircraft.
To mitigate this I removed the bezel from the monitor and cut the MIP as close to the top of it as I could. I also lowered the yoke as far as I could. I found that by sitting further back the angle of my legs allowed me to lower the bottom of the MIP quite a bit. The last thing I did was lower the exterior view monitors behind the rear of the MIP as far as possible without losing too much of the bottom of the picture.
I haven't got round to using car seats yet. If I raise the office chair I use to almost full height I can get my legs in under the MIP quite easily to use the rudder pedals, and the top of the exterior view monitors are just above my eyes. Ideally I would want to be almost looking down at them, but at least I'm looking straight ahead and not up. It's not perfect, but a pretty good compromise.
Also for the outside view would a 42" TV be any good or there a reason most people use the 3 monitor route?
I've never used a TV but I believe the resolution on a big TV would be pretty similar to a single monitor, ie. you wouldn't see any more to the left and right. The PC sees the three monitors as one super wide one with a res of 5760x1080, so it's really wide and normal height. The native resolution of a 1080p TV is only 1,920x1,080, so you're only seeing a third of the width of the image you would using three monitors, just larger. Hope that makes sense!
Sunday 17 March 2013
Monday 18 February 2013
Q&A
Doc Fester has asked a few questions in the comments of this post, so I thought I'd try to answer them in a post instead of comments to make them a bit more accessible.
Hope you don't mind, Pete :)
What do you think of a beamer setup for the outside view? I'm contemplating a single projector for forward view and possibly 2 monitors for left/right views. With an enclosed pit I just think it will give so much more realism. A single monitor IP for the guages, that's the idea anyhow!
I have a long term plan to build an enclosure and replace my current triple monitor setup with one of the following:
Side windows are important to me as I spend a lot of time glancing to each side, particularly when in the circuit. At the moment I have to use the hat switch to shift the main view which ruins the immersion.
I haven't looked into it enough to advise you on the best solution, but most enclosed simpits I've seen make use of projectors so if you have the space and the money that's probably the way to go. Not sure if one will be enough though, but you might get away with it if you're using monitors for side views.
If you haven't already done so I suggest you ask in some of the forums, as there are plenty of people out there far more knowledgeable than me on the pros and cons of projectors :)
I have a few old keyboards knocking around and thinking of going down the keyboard emulator route for many of the on/off switches. I own a sign company so bespoke panels are no problem for me.
I've seen keyboards with labels stuck on the keys used as switch panels, and they will certainly do the job for little or no outlay.
However, I prefer the tactile feedback of flicking a switch to pressing a button and I also think that bespoke panels look so much better than a keyboard. If you can make your own panels so much the better as I found actually attaching the switches to the Bodnar card was really simple. I would definitely go for bespoke.
You have gone for the GoFlight kit, better than Saitek?
After extensive research I went for the GoFlight modules mainly because I prefer their looks over the larger Saitek modules. It made sense financially as well as you can pick them up second hand pretty cheaply, particularly the older black ones that I use
I can't say if they're better as I've never used the Saitek modules, but I'm very pleased with the GoFlight kit.
My yoke, pedals and throttle quadrants are all Saitek though, and they're great.
How easy is the process of ganging the saitek quadrants to share throttle pitch etc?
Dead simple. I got one quadrant with the yoke which plugs into it using a DIN type connector. The second quadrant has a standard USB connector so you can plug it in anywhere. FSX recognises it and you can configure the levers and switches either in FSX or using FSUIPC in the usual way.
Hope that helps. Happy to answer anything I can.
Dom
Hope you don't mind, Pete :)
What do you think of a beamer setup for the outside view? I'm contemplating a single projector for forward view and possibly 2 monitors for left/right views. With an enclosed pit I just think it will give so much more realism. A single monitor IP for the guages, that's the idea anyhow!
I have a long term plan to build an enclosure and replace my current triple monitor setup with one of the following:
- Three projectors giving a wide enough field of view to allow me to make side windows. I'm not sure if this is feasible given the available space.
- One or more projectors for the main view and a monitor on either side as a side view, which is what you're suggesting.
Side windows are important to me as I spend a lot of time glancing to each side, particularly when in the circuit. At the moment I have to use the hat switch to shift the main view which ruins the immersion.
I haven't looked into it enough to advise you on the best solution, but most enclosed simpits I've seen make use of projectors so if you have the space and the money that's probably the way to go. Not sure if one will be enough though, but you might get away with it if you're using monitors for side views.
If you haven't already done so I suggest you ask in some of the forums, as there are plenty of people out there far more knowledgeable than me on the pros and cons of projectors :)
I have a few old keyboards knocking around and thinking of going down the keyboard emulator route for many of the on/off switches. I own a sign company so bespoke panels are no problem for me.
I've seen keyboards with labels stuck on the keys used as switch panels, and they will certainly do the job for little or no outlay.
However, I prefer the tactile feedback of flicking a switch to pressing a button and I also think that bespoke panels look so much better than a keyboard. If you can make your own panels so much the better as I found actually attaching the switches to the Bodnar card was really simple. I would definitely go for bespoke.
You have gone for the GoFlight kit, better than Saitek?
After extensive research I went for the GoFlight modules mainly because I prefer their looks over the larger Saitek modules. It made sense financially as well as you can pick them up second hand pretty cheaply, particularly the older black ones that I use
I can't say if they're better as I've never used the Saitek modules, but I'm very pleased with the GoFlight kit.
My yoke, pedals and throttle quadrants are all Saitek though, and they're great.
How easy is the process of ganging the saitek quadrants to share throttle pitch etc?
Dead simple. I got one quadrant with the yoke which plugs into it using a DIN type connector. The second quadrant has a standard USB connector so you can plug it in anywhere. FSX recognises it and you can configure the levers and switches either in FSX or using FSUIPC in the usual way.
Hope that helps. Happy to answer anything I can.
Dom
Radio stack and overhead
I managed to make some steady progress over December and January. I sprayed the MIP black using Halfords matt black spray, which made a big difference. I have some cheap black paint from B&Q to brush paint everything else.
I also got hold of a few more GoFlight modules which I've used to build a radio stack.
x1 GF-P8 button module
x4 GF-166A radio modules (3 pictured)
x1 GF-46 multi-function module

These were all the old black versions and pretty cheap on eBay, although one of the 166s was missing a knob when it arrived. I'll try to return the faulty one and sell on one of the others as I only need two of them. I'm thinking of replacing it with a second 46 so I can use one as a DME and one as a transponder. Then I'd like a GoFlight autopilot module to go in the centre pedestal or OEP.
They are all great modules but for a while I just had the 46 and, to be honest, you could get by with one of these on their own. You can pick them up for around £50 on eBay and they do pretty much everything. I can't recommend them highly enough for adding a bit of reality on a budget.
The idea was to use the P8 to switch between COM and NAV etc as in a RL radio stack, but I'm having trouble getting it to work.
I fixed the modules in place using these:


They're really excellent for fastening panels and look the part too.
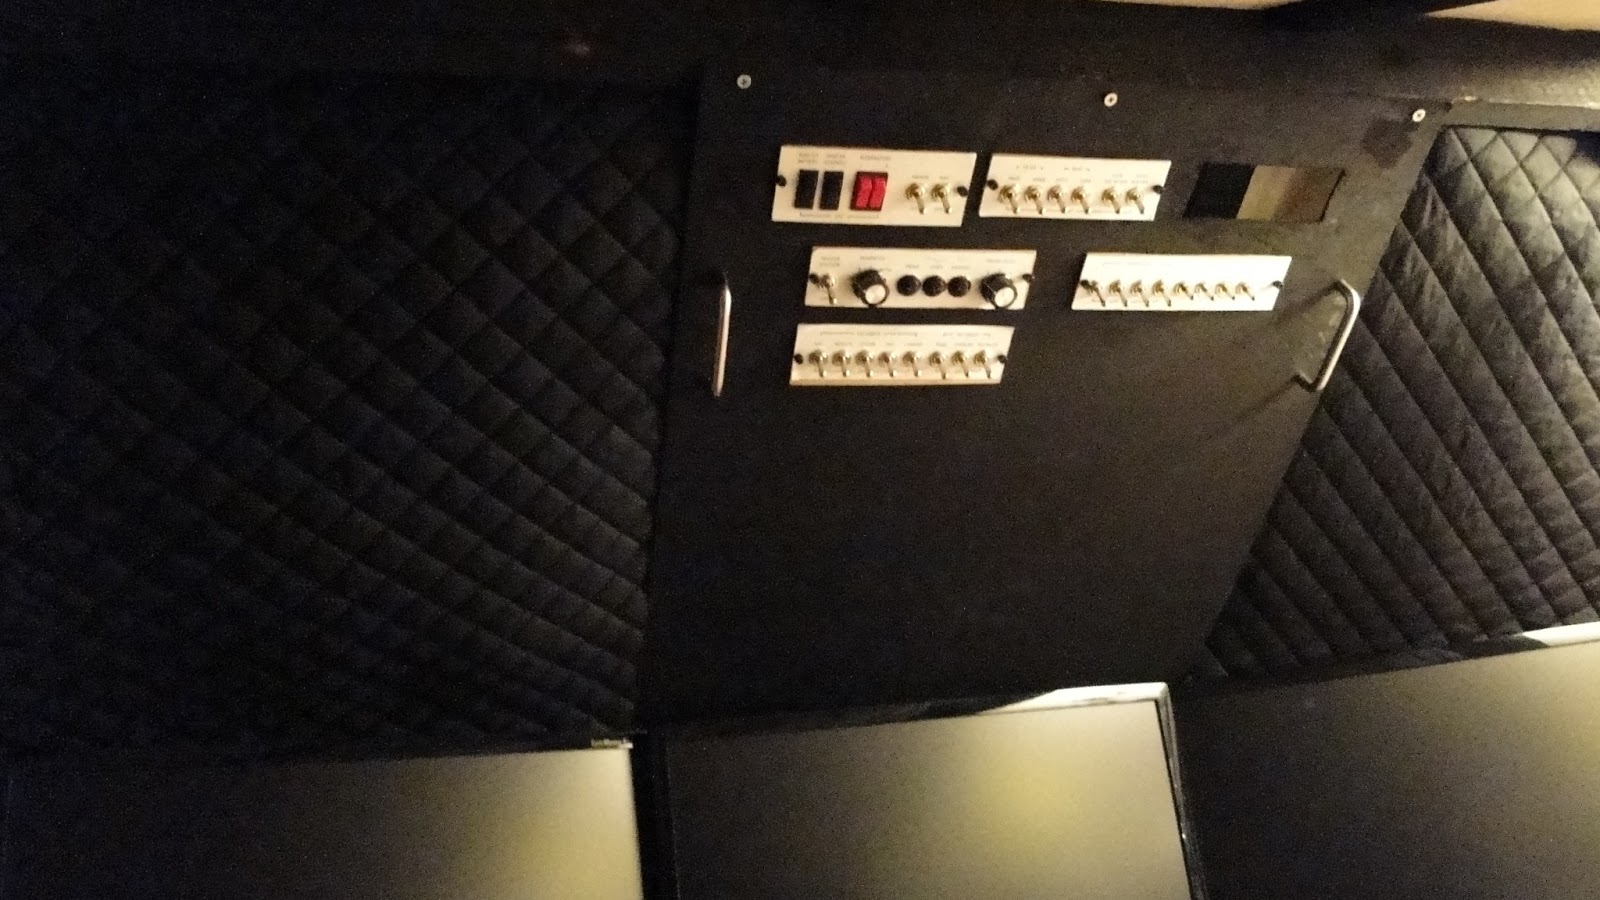
I also built a new overhead electrical panel. This took some time and now I've used up all the inputs on my Bodnar card, so I'll need a new one before I can add any more switches to it.


I got a couple of metal handles from Homebase and some black quilted material which looks pretty good as insulation pinned on either side of the OEP.
At the moment the individual switch panels are made from thin MDF with printed paper labels stuck on with spray mount. Once I'm happy with the design of these I will have them made up properly by a local signwriter shop I've spoken to.
I also got hold of a few more GoFlight modules which I've used to build a radio stack.
x1 GF-P8 button module
x4 GF-166A radio modules (3 pictured)
x1 GF-46 multi-function module

These were all the old black versions and pretty cheap on eBay, although one of the 166s was missing a knob when it arrived. I'll try to return the faulty one and sell on one of the others as I only need two of them. I'm thinking of replacing it with a second 46 so I can use one as a DME and one as a transponder. Then I'd like a GoFlight autopilot module to go in the centre pedestal or OEP.
They are all great modules but for a while I just had the 46 and, to be honest, you could get by with one of these on their own. You can pick them up for around £50 on eBay and they do pretty much everything. I can't recommend them highly enough for adding a bit of reality on a budget.
The idea was to use the P8 to switch between COM and NAV etc as in a RL radio stack, but I'm having trouble getting it to work.
I fixed the modules in place using these:


They're really excellent for fastening panels and look the part too.
I also built a new overhead electrical panel. This took some time and now I've used up all the inputs on my Bodnar card, so I'll need a new one before I can add any more switches to it.


I got a couple of metal handles from Homebase and some black quilted material which looks pretty good as insulation pinned on either side of the OEP.
At the moment the individual switch panels are made from thin MDF with printed paper labels stuck on with spray mount. Once I'm happy with the design of these I will have them made up properly by a local signwriter shop I've spoken to.
Monday 26 November 2012
OrbX FTX England is out!
I received a very exciting email over the weekend. As rumoured OrbX have been working on FTX England, and you can now pre-order the DRM free DVD edition from Flightstore.co.uk for dispatch on 21st December, or download it right away from The FlightSim Store.
The product covers all of England (not Wales or Scotland) but is not compatible with photorealistic scenery like GenX, so you'll have to make a choice. This is not a problem for me because, as I've mentioned before, I think FTX is far superior.
The product covers all of England (not Wales or Scotland) but is not compatible with photorealistic scenery like GenX, so you'll have to make a choice. This is not a problem for me because, as I've mentioned before, I think FTX is far superior.
Monday 19 November 2012
VoxATC only responding second time
Last week my VoxATC was playing up, or so I thought.
Anything I said to ATC was not being recognised the first time, but if I repeated it VoxATC would accept it on the second go and respond correctly.
It turned out that my microphone was playing up and VoxATC was actually not receiving anything that I said.
It took me a while to work this out as I had ruled out a faulty mic, figuring that if VoXATC heard me the second time the mic must be okay.
It seems that a little known (to me at least) feature of VoxATC is that if it doesn't recognise a message the first time, you can say anything the second time and it will accept it.
One thing the whole episode did make me realise was that, despite VoxATC's occasional quirkiness, flying without it is pretty pants now. It's become an indispensable part of the whole experience.
Saturday 10 November 2012
How to complete Rod's VOR lesson
I've been working through Rod Machado's flying lessons, partly as a refresher but mainly to get to the commercial pilot and ATP lessons.
As anyone who has tried these lessons will attest, they are a mixed bag. Some are very simple to complete while others seem to end for no good reason, despite following all of Rod's instructions. Often the messages on the screen contradict Rod, and the whole thing becomes very frustrating.
The one I have found most frustrating so far such is Rod's VOR lesson, which had me calling the poor guy every name under the sun for several days.
I must have tried to complete this damn lesson over twenty times. Every time I would fly past the VOR and head north as instructed but Rod would fail to tell me to turn west for the next leg of the flight. After a few minutes I would hear the dreaded, "Since that's not going too well..." and have to start again.
I finally managed to complete the lesson last night, and this is how I did it.
The trick seems to be lining up on the VOR while Rod is giving you his initial spiel at the start of the lesson. Take a look at the map and see where the VOR is located, just north and between the two runways. While Rod's flying adjust your heading bug to about 030 and wait for the VOR to centre before setting the bug back to 360. Also verify your position visually so that you're located directly south of where the VOR is shown on the map. You should do all this as soon as the lesson starts and aim to be back on 360 or pretty close to it by the time you take control of the aircraft.
You can now fly the lesson normally. Ignore Rod and any on-screen instructions to turn left or right. Track directly north making small adjustments to keep the VOR centred. You'll know if you've done it right because as you pass over the VOR the needle will swing quickly to the right before the To From flag flips.
The needle will centre again then start to drift slowly off centre once more as you move away from the VOR. Keep making small adjustments to keep the needle centred until your DME shows about 3nm.
If you've done it right Rod will tell you to make a left turn, and the rest of the lesson should work correctly.
Take that, Rod.
Tuesday 30 October 2012
GoFlight GF-LGT
I bought my first GoFlight module last week, a GF-LGT. I picked it up on eBay for under £40 which I'm very pleased with as the new ones are around £190!

Admittedly mine is the older model, black rather than grey and without the rudder and aileron trim or extra 3-way switch. As I have only ever used elevator trim and have plenty of switches this seems like a good trade off :)
My GF-LGT has an elevator trim wheel and a big ole landing gear lever linked to three LEDS (green is down, red is transitioning, off is up). It also has a switch for flaps.
I've decided to go with the older black GF modules as they are cheaper to pick up second hand and will match my MIP which will also be painted black.
After building and configuring several switch panels myself I was impressed by how easy it was set up the GF-LGT. After mounting the module in my MIP I dug out a USB cable and connected it up, then downloaded the latest GF software from their site.
I ran the GF config programme which detected the module and displayed a picture of it with dropdowns against each switch. All I needed to do was select the appropriate function for trim, gear and flaps and I was good to go.

Previously my gear, trim and flaps were mapped to the switches on my yoke. It's much more satisfying to slap a big lever up to raise the gear, and seeing the LEDs change from green to red gives me an absurd amount of pleasure. I really need to get out more.
Using the trim wheel is far more precise than the yoke switch, and gives a much greater degree of control. It really is a joy, and very close to the real world Cessna trim wheels I'm used to.
The flaps switch is a bit meh though. It's a feeble little thing which seems to be configured in reverse, so UP lowers the flaps and DOWN raises them. I'm sure this is easy to correct but the switch itself will always be naff. The GF-LGT-II has a proper paddle lever for the flaps but I'm sure this is still just attached to a two way momentary toggle switch.
What I would like is a lever that can be physically positioned in a detent for each flap setting, so you can see at a glance which position your flaps are in without having to display a gauge on the instrument monitor. Of course this poses problems in a generic cockpit, as some light a/c only have two flap positions while larger aircraft have five or more.
A project for the future might be to make a lever like this, or perhaps adapt a throttle quadrant for the job. I'm sure some imaginative labelling and profile specific axis mapping in FSUIPC will cope with all types of aircraft.
For now though I'm very pleased with my bargain purchase. I'll keep using the flaps switch (it's no better or worse than my existing one) and the elevator and gear lever (and LEDS!) are fantastic.
Highly recommended.
Next: GoFlight radio and transponder avionics modules.
Subscribe to:
Posts (Atom)